
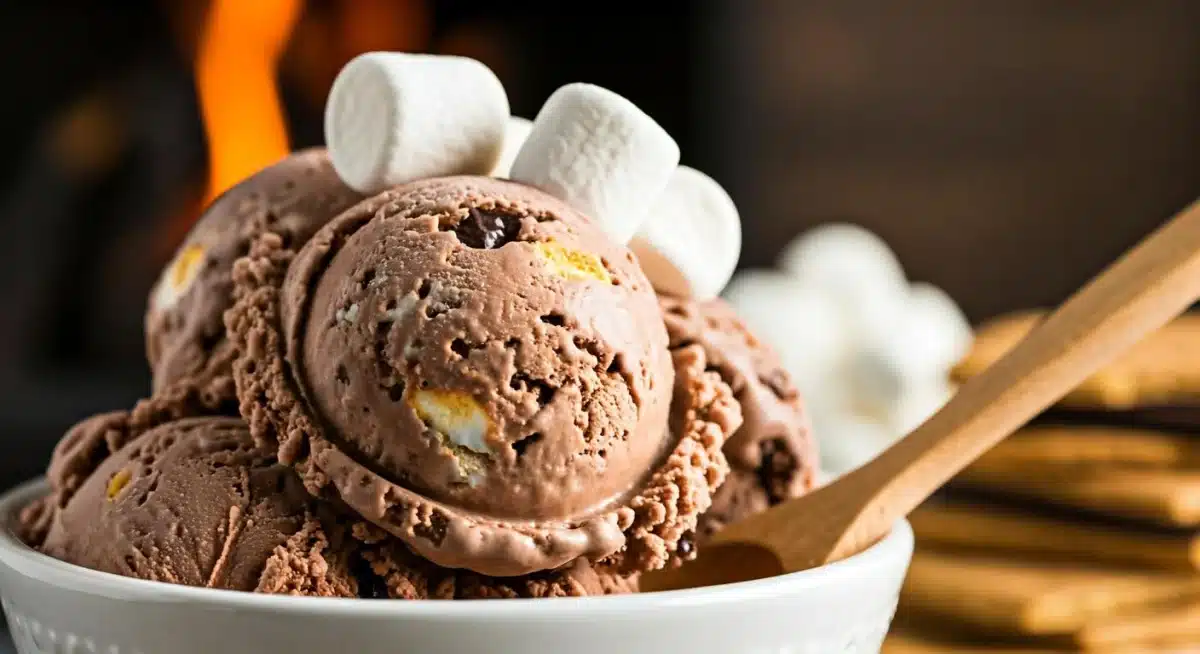
There’s something undeniably magical about s’mores ice cream that captures the essence of summer campfires and childhood memories. If you’ve ever wondered how to recreate that beloved combination of toasted marshmallows, melty chocolate, and crispy graham crackers in frozen form, you’re in for a treat. This homemade s’mores ice cream recipe transforms those nostalgic flavors into a creamy, indulgent dessert that tastes even better than the traditional campfire version.
The beauty of making s’mores ice cream at home is that you have complete control over every layer of flavor. You can toast your marshmallows to the perfect golden brown, use your favorite chocolate, and crush graham crackers to just the right texture. Whether you’re planning a summer gathering or simply craving a taste of nostalgia on a warm evening, this recipe delivers authentic s’mores flavor in every spoonful.
Homemade S’mores Ice Cream Recipe Card
| Prep Time: 20 minutes | Cook Time: 30 minutes |
| Chill Time: 4 hours | Churn Time: 25 minutes |
| Servings: 8-10 servings | Difficulty: Intermediate |
| Estimated Calories: 285 calories per serving | |
Ingredients for S’mores Ice Cream
For the Ice Cream Base:
- 2 cups heavy cream
- 1 cup whole milk
- ¾ cup granulated sugar
- 1 tablespoon vanilla extract
- ¼ teaspoon sea salt
- 6 ounces semi-sweet chocolate, chopped
- ¼ cup cocoa powder
For the Mix-Ins:
- 1 cup fresh marshmallows, cut into chunks
- ¾ cup graham cracker crumbs (about 6-8 crackers)
- ½ cup chocolate chunks or chocolate chips
- 2 tablespoons butter (for toasting marshmallows)
Vegan & Dairy-Free Substitutes:
- Heavy Cream: Use full-fat coconut cream (chilled overnight)
- Milk: Substitute with oat milk or almond milk
- Marshmallows: Look for agar-based vegan marshmallows
- Chocolate: Choose dairy-free dark chocolate (70% cacao or higher)
- Butter: Replace with coconut oil
Step-by-Step Instructions for Making S’mores Ice Cream
Step 1: Prepare the Chocolate Base
In a medium saucepan, heat the heavy cream over medium heat until small bubbles form around the edges (don’t let it boil). Remove from heat and add the chopped semi-sweet chocolate. Let it sit for 2 minutes, then whisk until completely smooth and melted. Stir in the cocoa powder until well combined, breaking up any lumps.
Step 2: Create the Ice Cream Custard
In a separate bowl, whisk together the milk, sugar, vanilla extract, and sea salt until the sugar is completely dissolved. Slowly pour this mixture into the chocolate cream, whisking constantly to combine. Make sure there are no lumps and the mixture is silky smooth. This is your ice cream base.
Step 3: Chill the Mixture
Pour the chocolate mixture into a bowl and cover it with plastic wrap. Refrigerate for at least 4 hours, or overnight if possible. This chilling time is crucial—it allows the flavors to meld and ensures your ice cream will freeze properly in the churner.
Step 4: Toast Your Marshmallows
While the base chills, prepare your marshmallow mix-in. Heat a cast-iron skillet or griddle over medium-high heat. Add 2 tablespoons of butter and let it melt. Working in batches, toast the marshmallow chunks for 1-2 minutes per side until they’re golden brown and slightly caramelized. Transfer to a plate and let cool completely. This toasting step is what makes homemade s’mores ice cream truly special—it deepens the marshmallow flavor.
Step 5: Prepare Graham Cracker Crumbs
Place graham crackers in a food processor or sealed bag and pulse or crush until you have coarse crumbs (not too fine—you want texture). You should have about ¾ cup. Set aside with your toasted marshmallows and chocolate chunks.
Step 6: Churn the Ice Cream
Pour your chilled chocolate mixture into an ice cream maker and churn according to the manufacturer’s instructions (typically 20-25 minutes). The mixture should reach a soft-serve consistency.
Step 7: Fold in S’mores Mix-Ins
In the last 2-3 minutes of churning, add your toasted marshmallows, graham cracker crumbs, and chocolate chunks. Fold them in gently to distribute evenly throughout the s’mores ice cream without breaking them down too much.
Step 8: Freeze Until Firm
Transfer the churned ice cream to a freezer-safe container, layering it with additional graham cracker crumbs and marshmallow pieces if desired. Cover and freeze for at least 4 hours until firm. This s’mores ice cream is best enjoyed within 2 weeks.
Chef’s Pro Tips for Perfect S’mores Ice Cream
Tip #1: Toast Your Marshmallows for Depth
The secret to authentic s’mores ice cream is toasting your marshmallows before adding them to the base. This caramelizes the surface and creates a deeper, more complex flavor that’s far superior to using raw marshmallows. You can use a kitchen torch instead of a skillet if you prefer—just torch each piece briefly until golden.
Tip #2: Don’t Skip the Chilling Step
I know it’s tempting to skip straight to churning, but chilling the base for at least 4 hours (preferably overnight) is non-negotiable. Cold mixture churns faster and creates a smoother, creamier texture. A warm or room-temperature base will take forever to freeze and may result in icy crystals.
Tip #3: Add Mix-Ins at the Last Minute
For the best texture, add your marshmallows, graham crackers, and chocolate during the final minutes of churning. If you add them too early, they’ll break down and lose their distinct texture. This keeps each element recognizable and delicious in your final s’mores ice cream.
Frequently Asked Questions About S’mores Ice Cream
Can I make s’mores ice cream without an ice cream maker?
Absolutely! While an ice cream maker creates the best texture, you can use the no-churn method. Pour your chilled chocolate base into a freezer-safe container and freeze for 30 minutes. Stir vigorously, then fold in your marshmallows, graham crackers, and chocolate. Freeze for another 30 minutes, stir again, and repeat this process 3-4 times until you reach soft-serve consistency. Freeze completely (4+ hours) before serving.
How long does homemade s’mores ice cream last in the freezer?
Homemade ice cream is best enjoyed within 2 weeks of making it. After that, ice crystals may form and the texture can become grainy. Always store it in an airtight container to prevent freezer burn and keep it away from strong-smelling foods that might transfer flavor.
Can I use store-bought marshmallows for this recipe?
Yes, but I highly recommend toasting them first. Store-bought marshmallows work perfectly in this s’mores ice cream recipe, and toasting them brings out incredible caramel notes that elevate the entire dessert. If you’re using vegan marshmallows, check the package first—some brands toast better than others.
Making homemade s’mores ice cream is an adventure in flavor that brings the joy of campfire s’mores indoors, any time of year. With its rich chocolate base, creamy texture, and delightful mix of toasted marshmallows, graham crackers, and chocolate, this dessert is guaranteed to become a summer favorite. Enjoy every nostalgic spoonful!
Related Recipes You’ll Love:
Lemon Cream Cheese Dump Cake Recipe: Easy No-Bake Dessert
Blueberry Cheesecake Recipe: Creamy Perfection with Homemade Blueberry Sauce
Gluten-Free Chocolate Chip Cookies Recipe: Almond Flour Maple Syrup Perfection